VSCodeでBlenderスクリプト編集環境準備
1. VSCodeをインストール
2. Python Extension をインストール
File → Preferences → Extensions 左のカラムに Python とかあるので(無ければ検索欄に入力する)インストール
3. Python Interpreterを設定
- 実行したいスクリプトがあるフォルダを開く
- F1 → Command Prompt → Select Python Interpreter
- Blenderのpythonを選択
C:\Program Files\Blender Foundation\Blender 2.91\2.91\python\bin\python.exe
4. Autocomplete をダウンロード
Blenderが最新すぎて↑になければ、古いものをインストールするか下記サイトの pypredef_gen.py を使ってAutocompleteのスクリプトを生成する
path_to_blender\Blender.exe -b -P pypredef_gen.py
5. VSCodeで Autocomplete が効くようにする
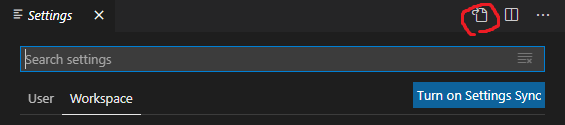
- File → Preferences → Settings → Workspace Settings
- 右上の Open Settings (JSON) を選ぶ
- autocompleteへのパスを追加
"python.autoComplete.extraPaths": [
    "C:/blender_autocomplete/2.91"
],
"python.linting.pylintArgs": [
    "--init-hook",
    "import sys; sys.path.append('C:/blender_autocomplete/2.91')"
]
6. Blender Development Extension をインストール
- File → Preferences → Extensions から検索欄に Blender Development 入力すると出てくるのでインストール
- スクリプトにブレークポイント貼っておく
- F1 → Blender: Start → Choose Blender Executable ...
- Blenderのexeを選んで起動(VSCodeを管理者で実行していないとうごかない模様+Blenderのバージョンによってはうまく起動できないのでさっさと他のバージョンをいれたほうがいい)
- Blenderのスクリプトエディタで自分のスクリプトを呼び出す
filename = C:\path_to_project\script.py
exec(compile(open(filename).read(), filename, 'exec'))
これでVSCode上でブレークポイントに引っ掛かるのを確認できた。複数スクリプトを使うプロジェクトを開発する場合はこちらを試すと良さそう。